In the post – Have you considered Cycling to Work? – I went through the things to reflect on when thinking about whether Cycling to Work is for you. If you’ve taken the plunge (or are still thinking) you may be considering whether you need specific items.
There are many many things to buy as a cyclist. Some stuff helps – improving comfort, helping efficiency, or keeping you warm. Some stuff doesn’t. As a human, you can just about justify any purchase. I want to talk to you about some of this cycling kit, whether you need it and give you some insight into it.
I started out as “make do” cyclist. I made just about anything (outside of a helmet) into feasible cycling kit. An old running jacket. A pair of astroturf trainers. I kept costs down and liked my urban commuter image. There was no way I was wearing lycra (unless it was under some baggy shorts).
Tribes
Talk of lycra brings us to cycling tribes. There are a lot of tribes. Road, mountain, grave, time trial, single-speed, lycra, baggy, carbon, steel, cleats etc. Generally, they all get on okay, but there are idiots in all walks of life that have problems with others and think one way is better than the other.
I would adapt Bill Bowerman’s quote – “If you have a body, you are an athlete” for cycling. “If you have a bicycle, you are a cyclist”. You can do it any way you like. Just get out there and do it!
This gets us past the “ You’re not a cyclist if you don’t……..” and brings us to a stumbling block for many cyclists. The weird world of “should I, or do I have to wear cleats?”
What are cleats?
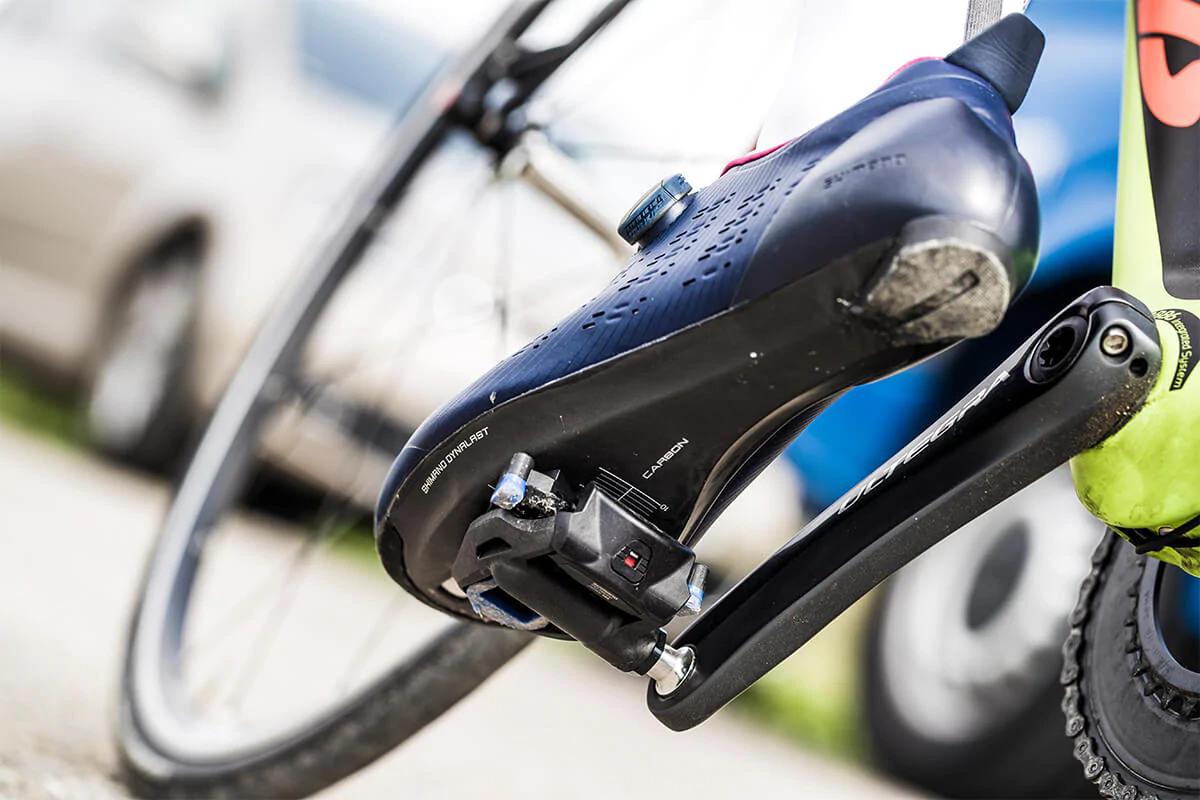
Thank you to Cycling UK for this concise explanation – Pedals that attach to your feet. A mechanism on the pedal clips on to a cleat, which is fitted to the sole of your shoe. The shoes are specific to the type of pedal.
So you need a particular pedal and a particular shoe that share the mechanism that connects them together.
Do I need them?
If your commuter is short (2-3 miles) or you are an occasional rider, there’s little to be gained from using cleats. Beyond 3 miles there is plenty to be gained.
Types
I’ll focus on the Shimano version. There are other versions available, mainly the Look mechanism for road bikes.
There are two main types, Shimano SPD and Shimano SPD SL. SPD stands for Shimano Pedalling Dynamics, with the SL standing for SuperLight.
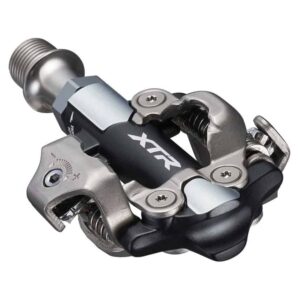
Shimano SPD – these are recessed cleats (on the base of the shoe) that allow you to walk around easily, are small, light and easy to clip in and out of. There come in double-sided or single-sided versions allowing you to clip into one (or both) sides of the pedal. They tend to be used by mountain bikers and touring cyclists.
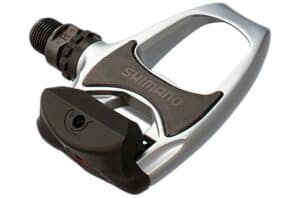
Shimano SPD SL – these are low weight and offer a larger contact area on the pedal making them more comfortable and allowing more power delivery and efficiency. The large cleat means you end up walking, or more descriptively waddling inelegantly. On wet surfaces, you can easily slip. They tend to be used by road cyclists, who don’t intend to walk around much.
Which one?
From the descriptions above, it would be conceivable that the choice is simple. The Shimano SPD seems to tick all the boxes. However, the Shimano SPD SLs are lighter, have a more direct feel, and improve power transfer and stability.
The awkward walking bit is likely the few metres out of your house and from where you lock your bike to the entrance to work, which is minimal. I use Shimano SPD SLs for my commute.
Mountain bike and some walking = SPD
Road bike and not so much walking = SPD SL
How long does it take to learn to clip in and out?
Everyone has a “learning to use cleats” story, but it doesn’t take a long time to master and quickly become second nature.
You set off, with one foot already clipped into the pedal, push off (and start pedalling) then once moving; you clip the second foot in. Upon coming to a stop, you twist one foot outwards to release it and place it down. If you are getting off the bike, you can then release the other foot.
The reason most people fall is that they don’t think about unclipping until they’re stationary. You should release your foot whilst rolling to come to a stop.
In the UK, it’s best to unclip the left foot first, that way, if you do slip or fall, you don’t do it into traffic.
Don’t be intimidated; practice whilst balanced against a wall or in a quiet area away from traffic or even on some grass until confident. I would suggest 20-30 minutes of practice is sufficient and you’ll be doing it without a second thought after a few rides. It’s also possible to loosen off the tension on the pedal to make it as easier to release your foot.
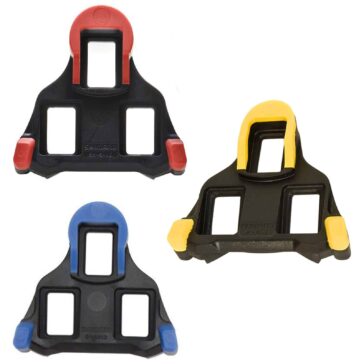
Why are the Shimano SPD-SL cleats different colours?
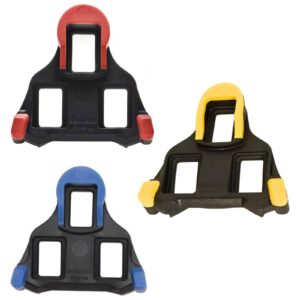
This indicates the amount of ‘float’ the cleat facilitates. Float is the amount of sideways movement available without the cleat unclipping. It allows a little movement so your feet are not misaligned when fixed in place. It also allows you to wiggle your feet to shake them out.
- Red 0° Float – no movement
- Blue 2° Float – a small amount of movement
- Yellow 6° Float – the most available amount of movement and provided with most Shimano SPD-SL pedals. The most popular colour with most cyclists.
What’s the cost?
Pedals – a pair of SPD-SL pedals cost around £45
Shoes – the price of SPD-SL compatible shoes can vary hugely, but start at around £60 and you can pick up a more “technical” shoe for a good price in a sale, or by choosing last years model.
Cleats – this sometimes come with the pedals, but replacements are around £15 and can normally be picked up for less. When I see them at a good price, I couple a couple of pairs. They can last 12-18 months or more (depending on use)
Conclusion
I was very against cleats when I started cycling. I thought they were for serious cyclists and if I used them, I’d be seen as a fraud. The thing is – no one gives a stuff, and no-one is paying attention to you, so do whatever you want.
I think cleats really help with cycling (especially uphill) and if you are serious about taking up cycling and commuting to work, you should give them a go (as long as you don’t need to walk around much). You’ll be glad you changed.
If you have any questions, post a comment or visit your local bike shop who will be able to advise you.
Disclosure – The links in the post contain affiliate links to Wiggle. I’m an independent blogger and the reviews done are based on my own opinions on products I have bought with my own money. If you like the blog or the post, please click through the links above to use the Wiggle site and make a purchase. The price you pay is not affected and helps keep the blog up and running. Thanks.


